Cement Wall Hooks
Cement Wall Hooks
Couldn't load pickup availability
A Compact Hook for Cement-Wall Installation
When adhesive mounting is not the right solution for your wall, a mechanical hook can provide a more suitable alternative.
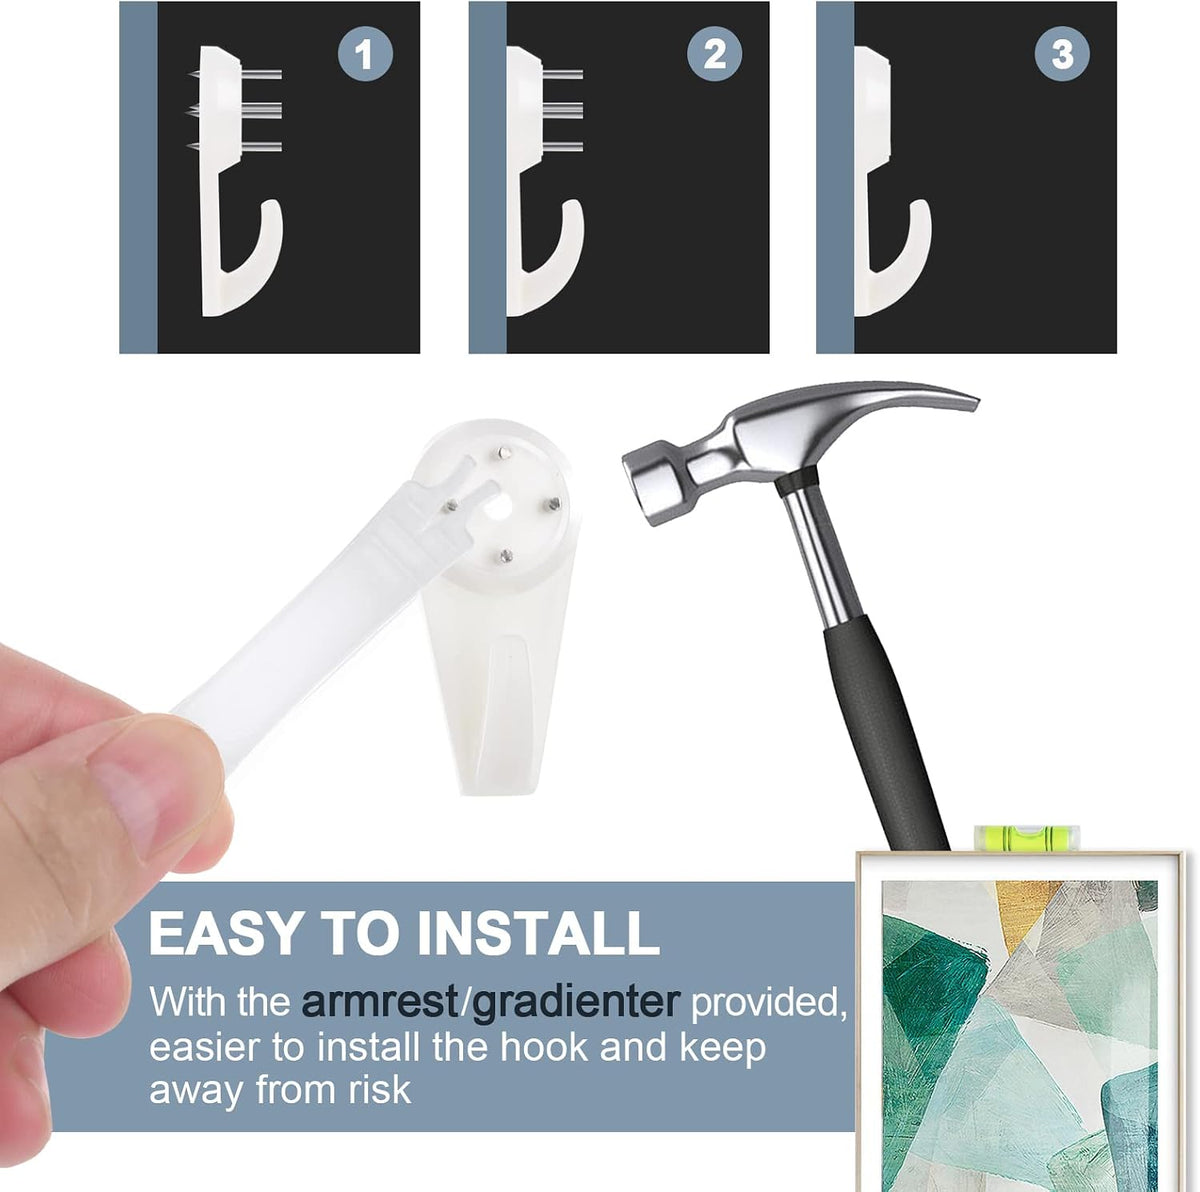
These cement wall hooks feature a compact nail-in design for installing a practical hanging point on suitable cement walls. Made from ABS and stainless steel and finished in white, the hook is designed to provide a simple, low-profile solution for everyday wall organization.
At just 19 × 41 × 9 mm, the compact format takes up very little visual space while providing a dedicated mounting point.
Key Benefits
- Designed for suitable cement-wall applications
- Nail-in installation
- ABS and stainless steel construction
- White finish
- Compact 19 × 41 × 9 mm size
- Low-profile wall-mounted design
- Suitable for practical household organization
- Lightweight product at approximately 0.04 kg
When Adhesive Mounting Isn't the Right Choice
Not every wall or installation situation is suited to an adhesive hook.
Cement walls can require a different approach when you need a mechanically installed mounting point. Instead of relying on an adhesive layer between the hook and wall surface, this product uses a nailed installation method.
That makes the installation approach fundamentally different from adhesive wall hooks.
If your project specifically requires a hook for a cement wall and you are comfortable with a nail-in installation, this compact design provides a straightforward option.
Designed for Cement-Wall Applications
The product's defining characteristic is its intended use with cement walls.
Rather than positioning this hook as a general adhesive accessory, it is designed around a wall-mounted mechanical installation.
This distinction matters when choosing the right hardware.
A hook should be selected according to the wall material, installation method, intended load, and conditions of use—not simply by appearance.
For cement-wall installations, confirm that the specific wall condition and installation method are appropriate before mounting the hook.
Nail-In Installation
These hooks use a nailed installation type.
That means installation is different from the no-drill adhesive hooks in your product range.
The mounting process should be carried out using the appropriate installation method and tools for the wall condition.
Before installation:
- Confirm the mounting location.
- Check the wall condition.
- Make sure the selected location is suitable for a nailed mounting point.
- Position the hook correctly.
- Install the nail according to the manufacturer's instructions.
- Check that the hook is securely mounted before placing an item on it.
Do not improvise the installation method or substitute an unsuitable fastener.
Product Specifications
| Specification: | Details |
|---|---|
| Product Name: | Cement Wall Hooks |
| Material: | ABS + Stainless Steel |
| Color: | White |
| Installation Type: | Nailed |
| Item Weight: | 0.04 kg |
| Size: | 19 × 41 × 9 mm |
| Primary Application: | Cement-wall hanging |
Load Capacity
A maximum load capacity was not provided in the current product specifications.
Do not assume a weight rating based on the material, size, or installation type.
For safe product positioning, obtain the manufacturer's tested maximum load before publishing a specific weight claim.
Choosing a Cement-Wall Hook
Before purchasing or installing a wall hook, consider four things:
Wall Material
Confirm that the hook is appropriate for your wall construction.
Installation Method
This product uses a nailed installation, unlike adhesive wall hooks.
Intended Load
The product should only be used within its verified load capacity.
Because no load rating has been supplied, obtain this information before hanging items with significant weight.
Installation Location
Choose a stable location that allows the hook to be installed correctly and gives the hanging item sufficient clearance.
How to Install Cement Wall Hooks
Step 1: Inspect the Wall
Check the cement wall and choose a stable installation location.
Avoid damaged or deteriorating areas.
Step 2: Determine the Position
Mark the intended location before installation.
If installing multiple hooks, measure the spacing in advance.
Step 3: Position the Hook
Place the hook in the correct orientation according to the manufacturer's instructions.
Step 4: Install the Nail
Use the specified nail and installation method.
The fastening method should be appropriate for the wall material and product design.
Step 5: Check the Installation
After installation, make sure the hook is firmly secured before using it.
Step 6: Add the Intended Item
Only hang an item once the installation has been checked and the item's weight is within the verified product capacity.
A Compact Mechanical Mounting Solution for Cement Walls
When your project calls for a wall hook designed around cement-wall installation, these compact nail-in hooks provide a simple alternative to adhesive mounting.
The ABS and stainless steel construction, white finish, and 19 × 41 × 9 mm dimensions create a compact, low-profile solution for suitable wall organization applications.
Choose the correct installation method for your wall, follow the manufacturer's instructions, and confirm the product's verified load capacity before hanging heavier items.
Share